- Are you working on sql queries often?
- Are you executing queries with different database servers (MySQL, PostgreSQL, Oracle)?
- Are you working on an application which should be tested on multiple databases?
Answer to all the 3 questions is : NetBeans Database Explorer.
Yes, NetBeans Database Explorer is the correct choice for you. Database Explorer is a simple database administrative tool which allows you to manage the live database connections, browse and visualize the database structures represented in the organized hierarchical form.
It allows you to perform common operations on database structures. This includes
- execute sql statements and queries.
- create, modify & delete tables
- add, delete columns, indexes.
- populating tables data
- view tables data.
- grabbing and recreating table structures.
Database Explorer
This blog illustrates how to set up a connection with MySQL database from the NetBeans IDE. Once connected, you can start use the SQL editor to execute queries, view the table data.
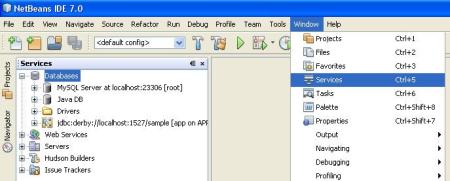
Go to Window -> Services(Short cut : Ctrl+5) – This will open a Services window, select Databases
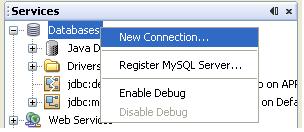
Select New Connection by right click the Databases.
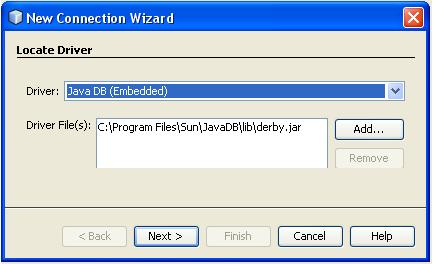
Database Driver Selection
The IDE comes bundled with drivers for MySQL, PostgreSQL, Oracle database servers. Select an appropriate JDBC drivers from the Driver combo box. NetBeans provides an option New Driver, with this you can import other database JDBC drivers and start interact with them.
Connection Wizard
Driver Name – JDBC Driver used to connect to the database server.
Host – Machine where the database server is running. It can be a remote machine also.
Port – Port number that the db server listens on.
Database – Name of the database you want to connect.(Optional)
Username/Password – Authentication credentials to connect & access the database.
Exploring Tables
Once the database connection was succeeded, browse and explore the tables/views present in the database. You can select a particular table and execute in the SQL editor by clicking View Data
Browse and select required columns of the table and view the data.
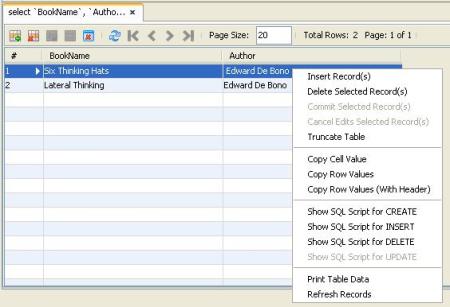
Query Output Window
This will display the executed query results. From here, you can Insert or Delete Rows.
SQL Editor
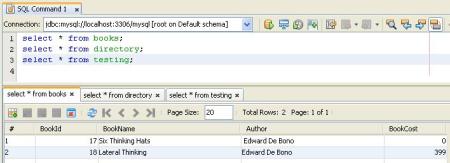
The advantage of this SQL Editor, you can execute multiple queries in a single shot and every query results are shown in tabbed views.
Multiple SQL Command Editors
With this you can connect and execute queries from different databases in different SQL command editors. Select a required connection db from the Connection combo box to execute the query.
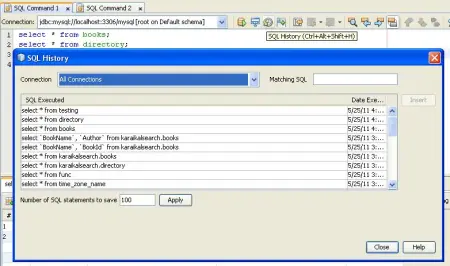
SQL History
It’s very useful to execute some of the queries which was written previously.
Overall, It is a good tool to manage the databases easily. Henceforth no need to go with separate tool for SQL editor, lets use NetBeans as both Java IDE as well as SQL IDE.
This document completely demonstrates with latest version(7.0) 0f NetBeans. You can download it from here.
